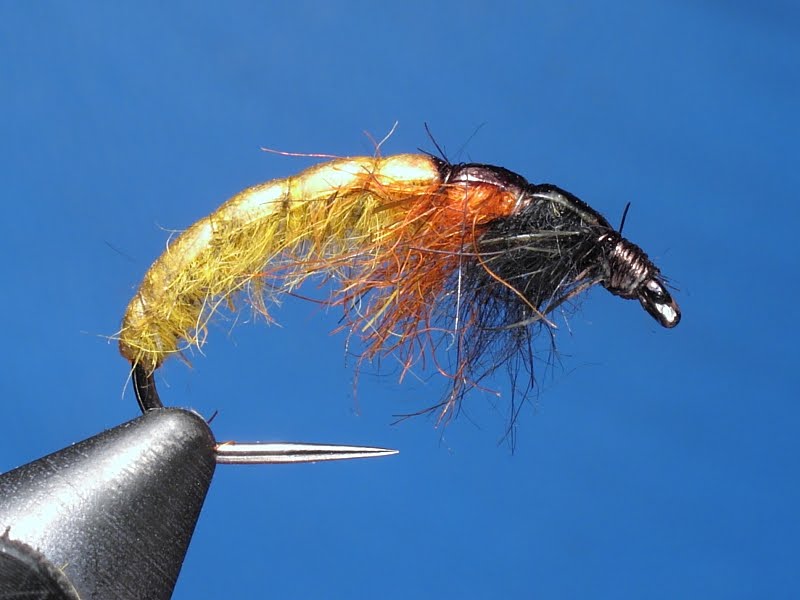
Czech Nymph
( in 10 easy steps)
Step 1: Hook SelectionSelect a scud hook of appropriate size. By appropriate I mean rather large - this one is size 8 and it is my favorite size for trout fishing.
You will want your nymph to be both slim and heavy at the same time; that simply does not work in sizes 14 and upwards.
 Step 2: Weight
Add a layer of lead. Flat lead works the best; it packs more tightly than round lead and high density is crucial. In this example
I went for one layer of lead, but you can add two for extra weight. In such case make the second layer one turn shorter on each
side to preserve the tapered look.Make sure the lead does not extend past the hook bend - you want to leave a plenty of space to
tie in the ribbing and back cover. Otherwise your nymph will have a fat ass, which is a major NO, NO! (any ladies reading this post?

)
 Step 3: Thread
Tie in your thread and tightly lash the weight to the hook. I have selected UNI 6/0 thread in color tan. The 6/0 thread is stronger than 8/0
I use for most of my other tying and can stand some abuse - it will receive a lot! I want my lead packed ever more tightly, high density is
very important for a CZ nymph. I selected color tan so that it will not darken the dubbing as black thread would.
 Step 4: Rib and Back Cover
Now make use of the empty space you left in the hook bend and tie in first the ribbing - I am using 0.16 mm monofilament spinning line here -
and then back cover. For back cover I am using 4 mm wide strip in honey color, so it will be just a shade darker than my dubbing.
Lash both to the hook bend very tightly, keeping in mind that the fat ass you are trying very hard to avoid.
 Step 5: Abdomen
Dub the abdomen - about one half of the nymph body, perhaps slightly more. I am using hare dubbing color light olive here, rabbit will
work also fine. If using natural dubbing (which I strongly suggest) be aware that it will darken once wet and select the color accordingly.
Again, keep in mind the fat ass you are trying very hard to avoid!
 Step 6: Hot Spot
Dub the hot spot (optional). Use bright red, orange or hot pink colors. Here I am using Seal fur colored hot orange.
The hot spot is optional - when fishing it can make your day or scare the fish witless for no apparent reason.
 Step 7: Thorax/Legs
Dub the front part of the fly. Use scruffy dubbing with longish hairs, so it will add movement to your fly.
I am using black hare mixed with black seal. Leave just enough space for the head.
 Step 8: Fold Over the Back Cover
This is the tricky part. Fold over the back cover, stretching it slightly forward so that it covers the body snugly.
Tie in with your tying thread and secure tightly. Whip finish - and
only then cut the redundant part off.
Few things are more frustrating than having the fly come apart at this stage due to sloppy tying of the back cover.
Trust me. I had it happen many times, and you would not wish to hear what I had to say about it.
 Step 9: Wrap the ribbing
Now that the tricky part is done you wrap your ribbing. Make sure you wrap in the direction of your tying thread,
mono is slippery and you want your fly to look neat.
 Step 10: Finishing touches
You are almost done. The only finishing touches left are brushing your fly vigorously with
a velcro strip and coloring your head and front half of the back cover with black marker.


